Using the Rose Excel Add-in for Windows
This an overview of the functions you can use to view data on Rose through Excel. If you haven't already, please install the Rose Excel Add-in first.
There are six basic functions in Rose that communicate between Rose and Excel to store data so that users or companies can always come back to it and be able to specifically access who, where, what, when, and how the data has been changed.
The six functions can be divided into two groups: push and pull; each group contains three functions.
From Rose to Excel:
- pull
- pull_map
- pull_logic
From Excel to Rose:
- push
- push_map
- push_logic
- push_metas
pull
This can be used for both logic and timeseries.
In Excel, type in the name of the dataset you would like to view; we will show a demo here using usa.lr, which is the long rates in the United States for the last 10 years.
In the cell below your dataset's name, type =pull(reference to rosecode cell), and hit enter.
As you can see, in the example above, first the metadata appears, then the range of dates, then the data contained in that timeseries as a table of two columns: date and value.
To pull several timeseries at once, write all the names in different Excel cells and pull the range selection of the cells. Here we demo with usa.lr, chn.lr. =pull(reference to range of rosecodes)
The last (optional) parameter we can use in pull is a range of dates. When you type pull, select the range of rosecodes and the range of dates in this format: `pull(reference to rosecode(s), range of dates).
push
The push function can only take in one parameter, which is the rosecode you want to push. In the exact same format as pull, call the function in the cell below the cell containing the rosecode(s).
push with metadata
To push a timeseries with metadata, follow the same format as the previous step but this time add the metadata table above your rosecode name.
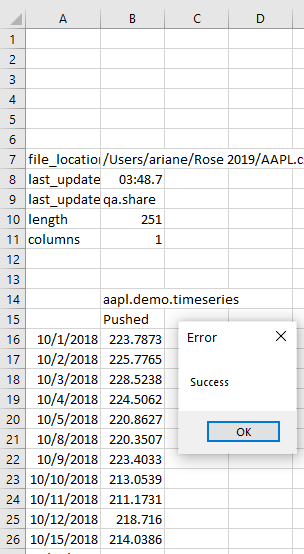
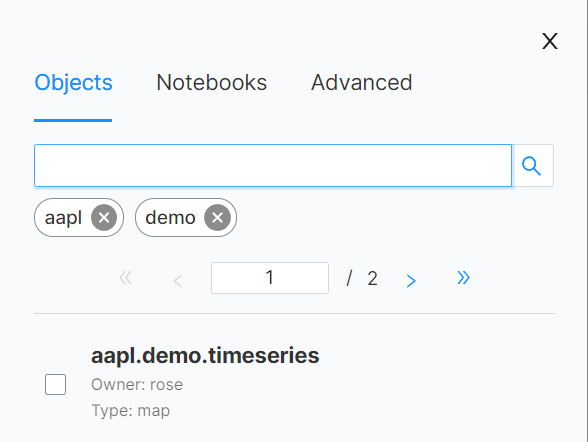
Now that timeseries will appear in the search results, on the left:
push_metas
This function can be used to push metadata for map and timeseries rosecodes on Rose.
In Excel, type in the rosecode of the dataset you would like to push the metadata for. If you would like to push metas for multiple rosecodes, put all the rosecodes in the same row and select all cells with rosecodes. Make sure all the rosecodes are in the same row. This will be the first parameter.
The second parameter is the metadata table to push. In the cells below your rosecode(s), type the metas you would like to push. Metas are always 2 columns with the first column being the key and the second column being the value.
The push_metas function also allows the option to either overwrite metadata or update existing metadata and keep old entries. This can be done by entering a third parameter of TRUE or FALSE. By default, overwrite is set to FALSE to only update without overwriting.
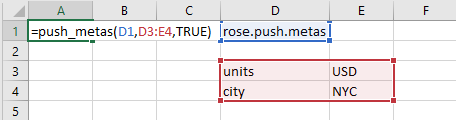
When you type push_metas, select the range of rosecodes, range of metas, and TRUE or FALSE in this format: `push_metas(reference to rosecode(s), range of metas, TRUE/FALSE).
Below is an example of push_metas using rose.push.metas
The metas in this demo are {units, USD} and {city, NYC}.
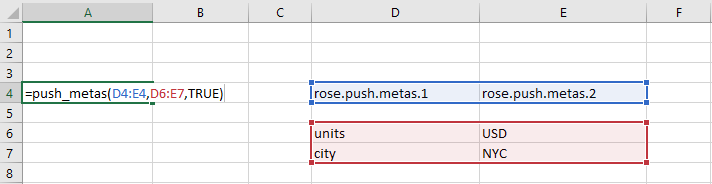
The next demo shows how to push metas for multiple rosecodes.
pull_map & push_map
Both of these functions only work on datasets of type map.
pull_map
This function can only take one parameter: the name of the map you want to pull. As with pull for timeseries, type in the pull_map command in the cell below the cell containing the map's name.

push_map
This function can take three parameters: the map name, the actual map, and the metadata. The metadata is an optional parameter; you can push a map just using its name and its contents, as below:
If you choose to add metadata for your map, you can add the range of the metadata as the third parameter.
pull_logic & push_logic
These functions help efficiently view data transformed (e.g. on a monthly scale, from monthly to monthly scale) so that it can easily be accessible.
These functions work only on data of type logic. They can both be used on several rosecodes.
pull_logic
The only parameters needed to pull logic from rose are the rosecodes. As usual, first type in the names of the data you would like to pull, and below these, call on pull_logic. You can pull multiple logics at the same time.
This function will show you the name of the data contained in the next node of the tree. Here is an example:
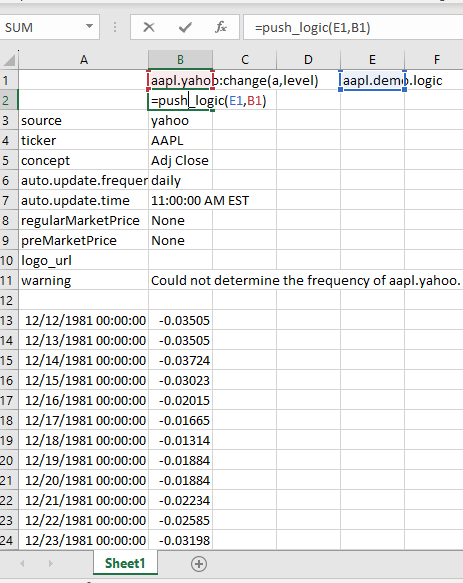
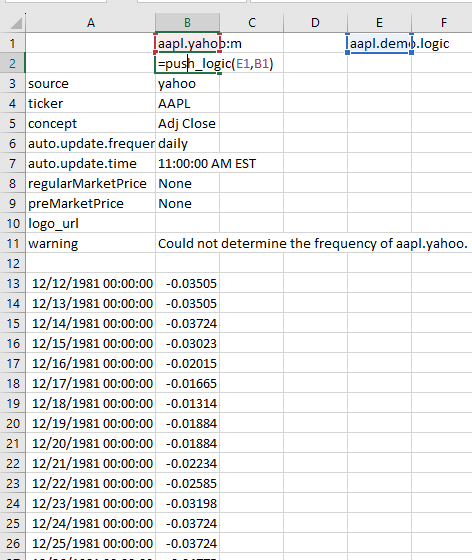
push_logic
To push logic, type in the name you have chosen (not the same as the one you previously pulled). Call on pull_logic on the cell below this name, select the new name and the old name as parameters. This will create a pointer and allow you to rename your data as you please.
The function push_logic creates a connection between two datasets; the more one uses it the more connections, and eventually it builds a *tree. The tree is rooted in ‘logic’ because all the nodes are essentially based on logic. Other examples include updating yield curve, or renaming a dataset.
The logic itself contains no data, it only points to where the data is. If there is more data inputted into existing nodes, it updates the existing data so that graphs and any analysis done on those graphs can be updated as well.
The logic function allows you to take transformations of data, assign this a new value or name, and then push or pull it onto Rose database, which helps create clean and efficient data that is easily traceable.
Logging in to Rose with the Rose Excel Add-in for Windows
Common uses for login
- Log into a https://rose.ai account
- Update credentials if account password was changed
- Switch the add-in to a different account
Logging into a rose account from the add-in can be done by using the login function. This function can be used to ensure that the desired account is currently connected and using the correct credentials. The Excel Add-in for Windows DOES NOT know when an account's password has been changed. This means if the connected account's password has changed recently, the credentials will be out-of-date in the add-in. Simply log back in with the login function and the credentials will be updated. In addition the login function can be used to switch to another https://rose.ai account if you have ownership of multiple accounts.
To use the login function, call the function in any cell using this format(including the double quotes): =login("username", "password")

Once logged in there will be a message that the account was logged in successfully or there was a problem with the credentials provided. If an error message related to incorrect credentials occur, check that your credentials are correct on https://rose.ai.

Once the add-in has successfully logged in, the entered credentials will be saved for the next time the add-in is used.